Showing posts with label food. Show all posts

Saturday, 14 July 2012

Chicken n butternut soup- A healthy start to a wonderful day!


Goodness of chicken and veggies.


This recipe 'Chicken n butternut soup' is dedicated towards all my health conscious friends. Soup is a healthy way to life. Combining the goodness of vegetables and chicken, cooked with the minimum amount of olive oil, it’s not only a healthy but a tasty treat as well. Butternut combines the goodness of vitamins and other essential minerals which is widely available in USA and eastern Canada. When you are in a mood to enjoy a light meal, I guarantee that this sort of soup dish will definitely satisfy your appetite and your heart to a large extent.


Ingredients: (for 3-5 persons)

Boneless chicken (350 gms.),

Butternut (a medium sized one peeled and diced into medium pieces),

Garlic (2 cloves),

Extra virgin olive oil (2 ½ tablespoons),

Baby corn (100 gms. chopped into thin circular pieces),

Spring onion (white part only),

Tomato (1 ½ pieces grated),

Chopped basil leaves,

Ground black pepper powder (½ teaspoon),

1 scoop of butter,

Salt according to taste.


Procedure: Boil the boneless chicken in a stock pan for 30 minutes. Separate the stock and keep the chicken pieces separate. Simultaneously heat the butternut in a container till it becomes soft. Heat olive oil in a stock pan. Add crushed garlic cloves to it. Add the pre boiled chicken pieces, spring onions, tomato, and baby corn to it. Cook for 5 minutes till the vegetable becomes soft. Add the pre boiled butternut to it. Add the chicken stock. Cook the entire content for 7-8 minutes, allow simmering in medium heat. The butternut should be mashed and the soup should get a thickened texture. You may add salt according to taste, chopped basil and black pepper for the ultimate flavor.

Ladle the soup in a bowl. You may add a dollop of butter on the top. The topping along with chopped basil leaves and black pepper will simply look awesome. Enjoy this awesome delight with bread/breadsticks.




Wednesday, 11 July 2012

Avocado and coconut- for a glowing skin !


If you want to have a glowing skin, you should be aware of your food habits as well. More of fresh green vegetables, fruits and stuffs like avocado, coconut will prove good for your skin in stipulated amount. But apart from consuming avocado and coconut directly, you can make a palatable curry to enjoy during your meals. Let’s see the method of preparing a curry with avocado and coconut milk.


Ingredients: (for 4-6 persons)

Avocado (2 medium sized ones cut into pieces),

Coconut milk (100 cc.),

Carrot (2 medium sized ones cut into smaller pieces),

Onions (1 medium sized one diced into pieces),

Tomato (1 medium sized one grated),

Turmeric powder (½ teaspoon),

Red chili powder (½ teaspoon),

Ginger paste (1 teaspoon),

Coriander powder (1 teaspoon),

Salt as per taste.


Procedure: Heat oil in a container. Add ginger paste to it and cook for 2 minutes. Add onions, tomatoes to it. Cook well till they become soft. Add the diced carrots, avocado to it. Add the spices (turmeric, coriander, red chili) to it. Cook well and then add 1 cup water to it so that it becomes absolutely soft. Add the coconut milk. Add salt for the ultimate taste. Cook for 5 minutes in covered condition.

Coconut and avocado is good for health and this is a tasty treat.


Monday, 18 June 2012

Khatta Baingan- the awesome , tantalizing taste of brinjal!


Awesome tantalizing taste of brinjal
 If you are a Vegetarian, then you have best of the health. For a person who’s a Vegetarian, sometimes it is a challenge what variety to prepare everyday? With the same ingredients but just by working out different permutation combination, you may prepare exciting food which will simply tantalize your taste buds. Brinjal (eggplants) is a tasty vegetable and when prepared with different ingredients then it might give marvelous tasty dishes. Last week I tried Khatta Baingan or sour eggplant. Let me share the recipe with all my readers.


Ingredients: (for preparation of 4-6 persons)

Brinjal/Eggplants (8-10 pieces of moderate size),

Onions (3 medium sized grated),

Coriander powder (1 teaspoon),

Cumin powder (1 teaspoon),

Ginger-garlic paste (1 teaspoon),

Red chili powder (½ teaspoon),

Turmeric powder (½ teaspoon),

Yoghurt/Curd (2 tablespoon),

Tamarind paste (prepared by soaking 10gms.of tamarind in 10cc of water and extracting the liquid)

Salt as per taste,

Oil for frying.

Procedure: Procure farm fresh eggplants/brinjal from the market and cut into longitudinal pieces. A single eggplant may be cut into 4 equal sizes. Marinate with little salt and turmeric powder for about 5-7 minutes. Heat little oil in a pan and start frying the eggplants. This dish does not require lot of oil as eggplants release its own water content and softens in a few minutes. Cook for about 7 minutes till the eggplants become soft. Remove them and keep apart. Dash grated onions into the oil in the frying pan. Add ginger-garlic paste, coriander powder, cumin powder, turmeric powder, red chili powder, salt into it. Cook the spices nicely till it emits a nice mind boggling flavor. Add yoghurt/curd to it. Add the eggplants which were already fried. Mix the ingredients well with the eggplants. Add the tamarind extract to it. Your very much desired Khatta Baingan (sour eggplants) is ready. You may serve it with chapatti.

You will love the sour taste of brinjal/eggplant. I guarantee that this is a nice combination and you may enjoy it with chapatti/paranthas as well as steaming hot rice. Enjoy vegetarian food; enjoy the different spice of life!


Monday, 11 June 2012

Baked Nile Perch- African wonder ; awesome taste.


Nile Perch is a kind of predator fish available in the rivers of Africa- Nile, Niger, Congo, Senegal and Lake Chad. This fish is widely available in fresh water even brackish water. It needs large amount of oxygen for breeding and normal functions. It’s found in large sized that may go up to 10 feet in height. Its flesh is sold in form of fillets to East African and Central African countries. Extremely nutritious in food value, this fish can be cooked in various forms with veggies and enjoyed along with family. My experiment with Nile Perch last week was extremely successful and my entire family enjoyed Baked Nile Perch. Let me share the recipe along with my readers.


Ingredients: (for preparation of 4-6 persons)

Fillets of Nile Perch (400 gms.),

Ginger garlic paste (1 teaspoon),

Tomato sauce (2 teaspoon),

Green chili Sauce (1 teaspoon),

Mustard sauce (1 teaspoon),

Onions (1 medium sized one grated),

Capsicum (1 medium sized one grated),

Lemon juice (1 teaspoon),

Salt as per taste,

Mixed herbs (a pinch) [Standard form available in the market a combo of oregano, basil, rosemary and parsley leaves in dried condition],

Ground black pepper (a pinch),

Oil (1 teaspoon).

Preparation time: 30 minutes

Procedure: The fish fillets are to be cut into pieces of 3”- 3”. Marinate them with ginger-garlic paste, tomato sauce, green chili sauce, mustard sauce, lemon juice, salt and 1 teaspoon oil. Keep the fish in marinated condition for 10 minutes. Place the grated veggies (onions and capsicum) over it. Place the entire content in an aluminum foil and wrap it from both sides. Then put it in oven at 220degrees for 30 minutes. Remove it after 30 minutes and serve it with rice/ugly. The fish becomes extremely soft and the veggies taste truly awesome along with it.

This is an extremely healthy food with the least amount of oil/calorific compounds used here. A typical African preparation enjoyed people of all ages.


Saturday, 26 May 2012

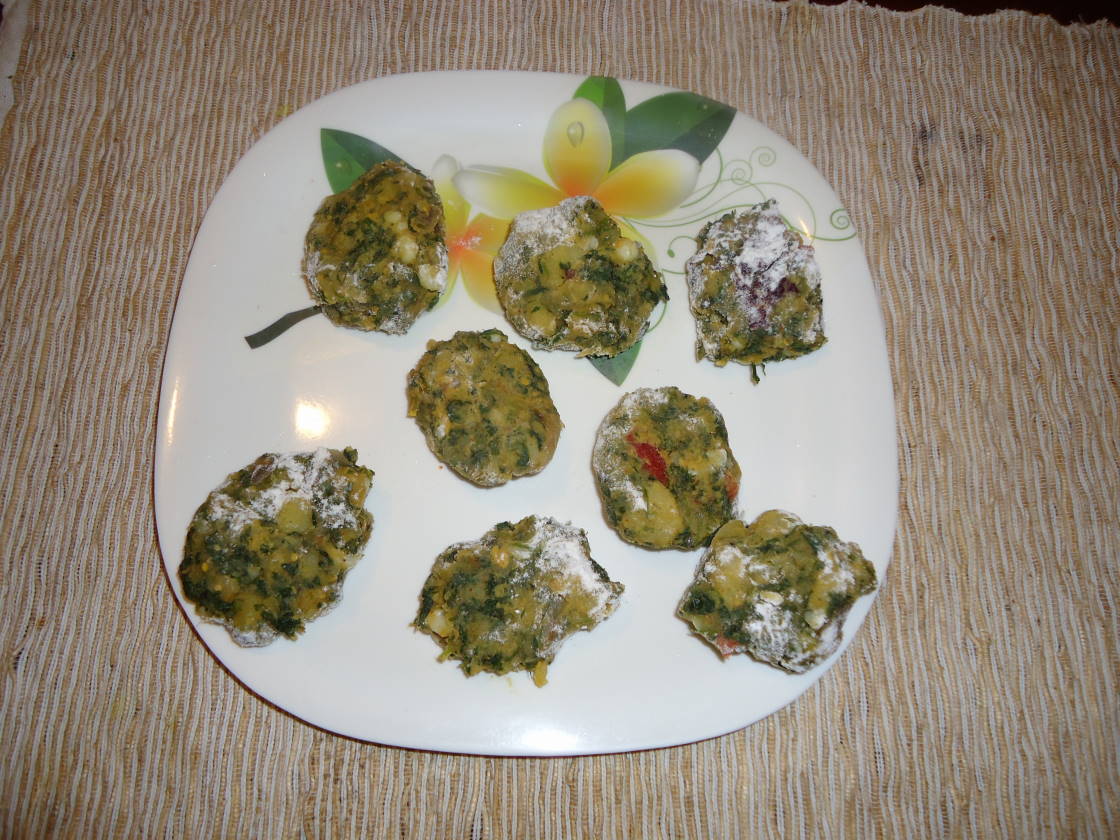
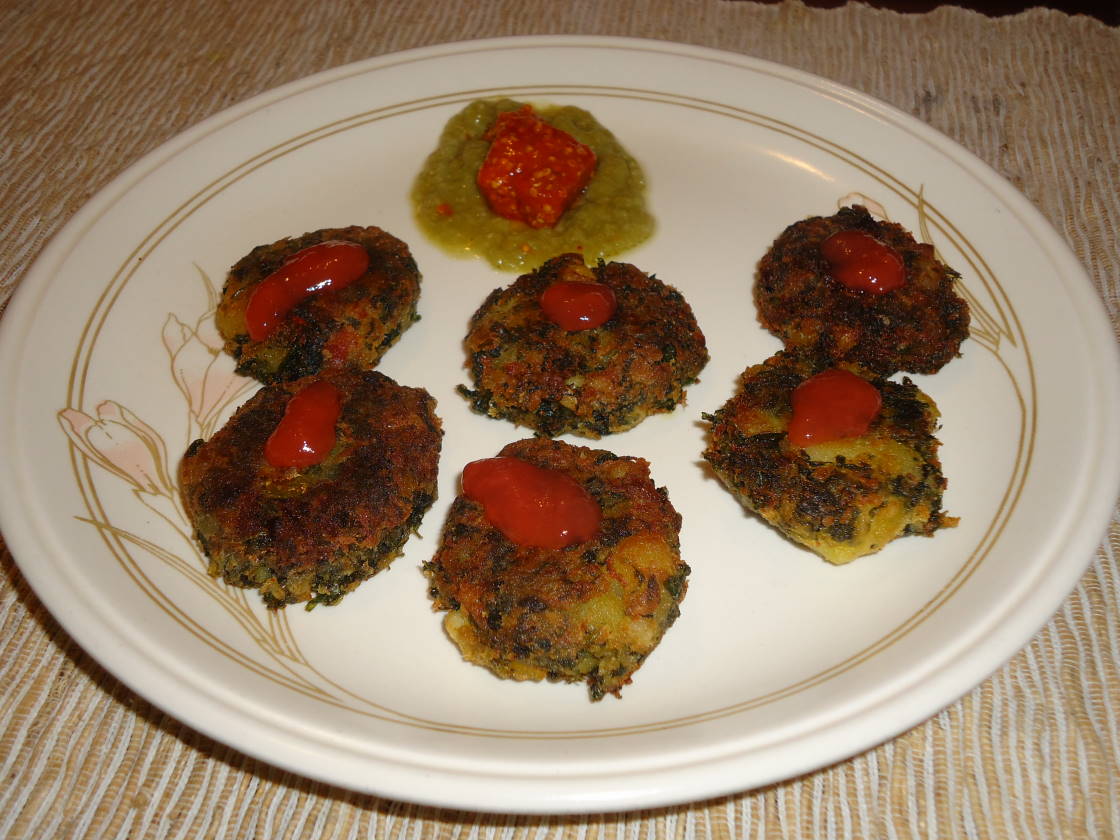
Methi corn vatata vada; Wonder how different it can be?


It's fun trying varieties in life.
 There comes certain moments in life that you wander what’s new in my life? The same routine, the same food and the same way back to home. So either you look for variety in life or your kitchen. Leafy vegetables are very good for health as they are rich in essential vitamins and other minerals. But the regular way to prepare this may bring boredom and drudgery to the lives of your family members. Last week I tried a different way to a mouthwatering palatable snack out of fenugreek (Methi saag) which turned out to be truly excellent. Let me share this recipe with all my readers.


Ingredients :( for preparation of 30 pieces)

Fenugreek [Methi saag] (3 bundles regular size available in the market),

Potatoes (5 medium sized ones boiled and mashed),

Boiled corn (30 gms.),

Cumin powder (1 teaspoon),

Chili powder (1 teaspoon),

Ginger garlic paste (½ teaspoon),

Mixed pickle (1 teaspoon) [Indian condiment made of all seasonal vegetables],

Corn flour (little to be used while binding the vadas),

Salt according to taste,

Oil for frying.

Procedure: the procedure is shown schematically with the help of pictorial representation.


Step 1: Boil potatoes and keep aside. Wash the methi leaves well under running water and then wash with hot water to remove the minute stains of dirt present in it. Boil the methi leaves till they become a soft dough.


Step 2: Mash the potatoes, mix with methi, boiled corns. Fry cumin powder, chili powder, salt, ginger garlic paste and mixed pickle in ½ teaspoon oil. Mix the fried spices with the dough. You will observe that a nice mind boggling smell comes out of the methi mixed dough.


Step 3: Prepare smaller doughs . Use your hands to make flattened circular structure. You may use little corn flour in order to avoid sticking the balls while preparing.


Step 4: Heat oil and shallow fry the rounded structures. Remove from the kadhai; serve it in a palate along with green chutni/sauces of your choice.

This can be a very much desirable snack and you may have it with tea, as a starter during parties or alternatively as a tiffin item for your kid’s lunch box. Ensure good health to your beloved ones and decipher the variety of life through your culinary skills.


Tuesday, 15 May 2012

Chicken spring roll- yummy treat for the party tonight!!


The crunchy , crispy mouthwatering deal.

Introduction: Chicken spring roll is a delicious item and a palatable snack. It’s a very popular food item nowadays available in almost all the food joints in India. Chicken is a very wholesome, nutritious item and cherished all over the world for its different forms of consumption. Let’s see the method of preparation of Chicken spring roll.

Ingredients:

Samosa covers (standard size of 25 packs available in the market),

Boneless chicken,

Onions (2 medium sized chopped into smaller pieces),

Capsicum (1 medium sized chopped into smaller pieces),

Tomatoes (2 medium sized chopped into smaller pieces),

Garlic crushed (2 cloves),

White flour ( 10gms.),

Water (1 tablespoon),

Salt as per taste,

Oil for frying.


Procedure: Boil boneless chicken for 10 minutes in a pressure cooker. It should be pressed with hand to make dough. Heat oil in a frying pan. Dash capsicum, tomatoes and onions in the oil. Add the crushed garlic to the mixture. Add salt according to taste. Now remove the mixture and allow it to cool down. Prepare a paste with white flour and water which will act as a natural gum to close the stuffing’s. Take samosa leaves separately and place it on the cutting tray. Start filling the chicken stuffing’s in a longitudinal manner and then close the end of the samosa cover with the flour paste. Keep in this condition for 15 minutes. The flour gum paste should dry up so as to make a very rigid covering. Deep fry the prepared structures for 3-4 minutes. You will obtain crispy, tasty chicken spring roll. This can be a very good tiffin item for your children. Prepare the structure and store in refrigerated condition the previous night, remove in the morning, fry and pack for your kid’s lunch box. Procedure shown schematically with the help of pictorial representation.


Step 1: Prepare the chicken fillings


Step 2: Prepare fillings with the cover.


Step 3: Start rolling the cover along with the fillings.


Step 4: Rolls prepared to be fried.


Serve it with hot chili sauce/sauce of your choice.


Wednesday, 9 May 2012

A guest post from freeindianrecipes.com

Chicken n corn sandwich


Love the mind boggling appearance


Mommies of school going kids are always wondering what to prepare for her darling’s lunch box the next day. Nothing can be a more easily available item other than bread. Perhaps sandwich with various permutation combinations can be the best option for any school going kid. Last week when I was on the challenge to create the very best out of the limited resources in my kitchen, the idea of 'Chicken corn sandwich’ clicked my mind and it was a wonderful dish out of the easily available ingredients in my house. Let’s share my experience with all my friends.


Ingredients: (for preparing 6 sandwiches)

Bread,

Chicken (300 gms. boneless),

Onions (1 big sized chopped into smaller pieces),

Tomatoes (1 big sized chopped into smaller pieces),

Capsicum (1 medium sized chopped into smaller pieces),

Boiled corn (1 medium sized one),

Garlic (1 clove crushed),

Dried oregano powder (1 teaspoon)

Green chilies (2-3 pieces chopped into smaller pieces),

Salt as per taste.

Equipments used:

Sandwich maker,

Brush for putting oil.


Crispy, crunchy deal


Procedure: Boil boneless chicken for 15 minutes till it becomes soft. Mash it with the help of a spatula. Keep it aside. Boil maize in a container till it becomes soft enough. Heat oil in a container and dash the vegetables (onions, tomatoes, capsicum) into it. Add crushed garlic and chopped green chilies to it. Add salt and boiled corns to it. Allow the mixture to cool down. Take bread and put the chicken stuffing’s inside. Sprinkle oregano powder on it for the ultimate flavor. Cover it with another one. Prepare stuffed bread like this and bake it to a sandwich maker for 5 minutes. You may use a brush to apply oil on both sides. After 4 minutes, remove the sandwich from the electric gazette. Tasty, crispy sandwich is ready to romance with your tongue.

This may be a good tiffin item for your child’s lunch box. Well, this can be a solution for some quick snacks for some guests who give you a surprise visit.


Friday, 4 May 2012

Jhinge aloo posto- perfect start to a bengali lunch


Jhinge aloo posto is a traditional Bengali food item. For a Bengali it’s a very common dish for his lunch. Jhinge (Ridge gourd) has got immense nutrition values and the high water content in it. Poppy seeds help to keep your brains calm. Whenever you go to a Bengali restaurant, a thali will always have jhinge aloo posto as a must item. I am sharing this for all my non Bengali friends.


Ingredients: (for 4 persons)

Jhinge [Ridge gourd] (6 pieces, medium sized de-skinned and chopped into medium pieces),

Potatoes (2 medium sized, chopped into medium pieces),

Poppy seeds (30 gms. approximately),

Mustard oil for cooking (preferably),

Turmeric powder (¾ Th teaspoon),

Green chilies (2-3 slit in between),

Salt as per taste.


Procedure: Soak poppy seeds in water and keep for 15 minutes. Grind with the help of a mortar and pestle or even you can grind in a mixer grinder. Keep the paste aside. Heat some mustard oil in a frying pan. Dash the vegetables (jhinge and potatoes) into it. Cook well for 5 minutes till the vegetables become soft. Add the paste of poppy seeds into it. Mix the veggies well with the poppy seeds. Add salt and green chilies. You may add ½ cup of water to obtain an even paste.

Jhinge aloo posto, steaming rice and ghee- a perfect start to a traditional Bengali lunch.


Saturday, 28 April 2012

Spicy Lady's finger; Healthy way to life


Lady's finger in selected spices
 Lady’s finger (bhindi) is a great source of active protein. People who are on restricted diet and on the verge of struggling against obesity, high blood pressure, diabetes and other illness opt for healthy food. But it does not necessarily means that healthy food has to be tasteless. With the incremental percentage of health hazards, people have shifted to spicy health foods. Inspired by one of my friends staying in the US who’s a culinary expert, I have tried a dish with lady’s finger which turned out to be extremely delicious.


Ingredients: (for 2 persons)

Lady’s finger (250 gms.),

Cloves (5 gms. crushed),

Cardamom (2 pieces),

Mangosteen juice,( 1 tablespoon),

Salt as per taste,

Black pepper powder (1 teaspoon),

Olive oil (2 tablespoon).


Procedure: Mangosteen is a tropical fruit found in south East Asian countries. It has got anti-inflammatory, anti-microbial, anti-fungal and antiseptic properties. Boil the lady’s finger for 5 minutes and drain the water. Prepare a paste of crushed cloves, crushed cardamom, mangosteen, black pepper in olive oil. Blend the mixture of spices with the lady’s finger and then toss in a pan for 3 minutes. The vegetable along with the spice will give a nice taste. This health food can be tried by people who suffer from all sorts of health problems. Moreover, use of mangosteen is a preventive measure against all the health hazards mentioned above.

You may enjoy this as a salad.


Tuesday, 24 April 2012

Chicken in South Indian style- love the fiery coconutty taste


Yummy chicken in coocnut gravy.

Chicken is the ultimate source of protein. It has high dietary fiber content. Rich in Niacin and Selenium, chicken is categorized as lean meat that protects against cancer and age related deterioration. Chicken can be cooked in a marvelous way when combined with ingredients like coconut. One day I went to a friend’s house who was a South Indian by origin and I was bewildered by the South Indian style of cooking. Chicken cooked with ground coconut, Kari leaves and mustard added a different degree in taste, aroma and I must say that the taste was simply superb. Let me share the recipe with all my readers.


Ingredients: (for preparation of 4-6 people)

Whole chicken (medium sized about 750 gms, cut and cleaned nicely),

Curd (3 tablespoons),

Turmeric powder (1 ½ teaspoons),

Kari leaves (2-3 streams),

Green chilies (10 pcs.)

Mustard seeds (about a pinch),

Coconut oil for frying (preferably),

Grated coconut (1/2 piece),

Saunf or Fennel seeds( 10 gms.),

Poppy seeds ( 10gms.),

Salt according to taste.


Procedure: Cut the chicken into medium pieces and marinate it with curd, salt and turmeric powder for about 10 minutes. Make a blend with ½ pieces of grated coconut, saunf, poppy seeds and green chilies in a mixer grinder. Keep the paste apart. Heat coconut oil in a container and dash mustard seeds, Kari leaves to it. Release the already marinated chicken to it. Cook it for about 5-7 minutes till the chicken gets soft. Add the blend of coconut, saunf and poppy seeds to it. Cook for about 4 minutes till the mixture gets an even blend. Add green chilies slit from between. Add the rest of the curd to it. Cook well till the chicken gets well mixed with all other ingredients. Add ½ cup of water to it. You will get thick gravy which is yellowish white in color. The aroma of Kari leaves is simply mind boggling and you will get the ambience of a typical south Indian cuisine from your kitchen.

You may enjoy this with rice /chapatti. I bet you will enjoy the hot taste madly.


Monday, 16 April 2012

Palak Mushroom- the truly mindblowing innovative experience!


The use of mushroom is becoming popular among the majority of Indian population. The success of a housewife/ chef remains in the fact that how efficiently she combines the ingredients to obtain innovative mouthwatering dishes. Apart from traditional, noveau recipes with an ‘out of the box’ savor are what very much desired out of daily cooking. One such experiment lead me to a great creation of non- traditional recipe ‘Palak mushroom’ which ended in a nice, mind boggling flavor. Let me share the recipe with all of my friends.


Ingredients: (for preparation of 4-6 people)

Button mushroom (1 packet about 250 gms.),

Spinach (4 bundles, normal size),

Ginger-garlic paste (1 teaspoon),

Onions (2 medium sized grated),

Tomato (1 medium sized grated nicely),

Cumin powder (1 teaspoon),

Coriander powder (1 teaspoon),

Green peas ( 20 gms, optional).

Turmeric powder (1 teaspoon),

Chili powder (1 teaspoon),

Garam masala (1 teaspoon) [it is a combination of cardamom, cinnamon, pepper, cloves]

Salt according to taste.


Procedure: The spinach has to be cleaned under running tap water in order to clean the least amount of dirt attached with it. Boil water for 5 minutes and then dip the spinach bundles into it so as to disinfect from the least strain of bacteria /germs present in it. The spinach becomes soft. Blend the spinach in a blender so as to obtain a smooth paste. Keep it aside. Take the button mushrooms and put it in boiling water. Boil it for 5 minutes till it becomes soft. Remove the water and allow it to dry. Heat oil in a container and dash the vegetables (onions, tomatoes, green peas) into it. Cook till the vegetables become soft. Add ginger-garlic paste to it. Add the spices (cumin, coriander, turmeric powder, garam masala) to it. It will emit a nice flavor. Cook well till all the ingredients take a nice blend and then add the mushrooms to it. When the mushrooms are nicely cooked then add the palak/spinach paste with it. Cook well for about 10 minutes. The spinach should be well cooked and blend with the other ingredients. I will take a nice green texture and a very even contour. Remove it from the cooking pan and it’s ready to be served.

The taste is really awesome and I guarantee your family will enjoy this new dish. For mushroom lovers it is a heavenly dish. Try the variety of life and enjoy every moment of it.


Tuesday, 10 April 2012

Vermicelli Upma- exceptionally good, innovative dish! Variety is exciting;


Every one of us is bore with the same type of food, ingredients and combinations. I was watching a game show when an idea of an exceptional dish came to my mind and I thought, let’s give it a try. A fusion of the Western and the Indian culinary art- cooking vermicelli in the style of traditional upma of south Indian style. The blend of vermicelli with Indian spices and herbs were simply superb, and it gave a melt in mouth experience. Let me share this easy yet delicious recipe 'Vermicelli Upma' with all my readers.


Ingredients: (for preparation of 4-6 people)

Vermicelli (1 packet),

Mustard seeds (a pinch),

Kari leaves (about 2 streams),

Tomatoes (1 medium sized chopped),

Onions (1 medium sized chopped),

Potatoes (1 medium sized chopped).

Oil for frying.


Procedure: Boil the vermicelli sticks in hot water till it becomes soft but should be over boiled. The best way to avoid sticking of the vermicelli strips is to boil along with 1 teaspoon oil. Drain the water and allow it to dry. Pour oil in a frying pan and heat it. Dash the chopped vegetables (tomatoes, onions, potatoes) into it. Cook till they become soft. Dash Kari leaves and mustard seeds into the container. You will hear the sizzling of mustards seeds. Add salt according to your taste. Add the already boiled vermicelli into it. Mix well till the whole of the vermicelli mixes well with the vegetables till it gets the aroma of Kari leaves. Remove it from the frying pan and serve it to your family.

It’s quite easy, takes minimum time and a very mush desired item for lunch box. It’s wholesome and convenient. Being a woman of 21st century it’s mandatory for you to adopt easy, smart ways to wholesome food.


Friday, 6 April 2012

Apple Pie - simply irresistible treat for this Easter!


Easter is approaching and it’s high time that the family should sit together to enjoy special delicacies. Let’s make a sweet introduction to this festive season and experience something very different and westernized - Apple pie. Believe me my friends, baking item like this is simply superb in taste but it’s really an easy task to prepare them. All you need to do is put it inside the oven and relax. Your favorite apple pie is ready …………………..indulge yourself to get a bite of the very desired awaited masterpiece culinary creation of yours. Let me share the secret of this recipe with all of my readers.


Ingredients: (for preparing a medium sized one)

Apples medium sized (4 nos. sliced into equal longitudinal pieces),

Lemon juice (squeezed out of 2 medium sized juicy ones),

Sugar (150 gms.),

Cardamom powder (1/3 rd teaspoon),

Unsalted butter (250 gms.),

White flour (350 gms.),

Baking powder (1 teaspoon),

Baking soda (½ teaspoon),

Equipments used:

Pie tray,

Brush to apply oil on surface,

Oven.


Procedure: The process for making apple pie is depicted in a step wise manner with the help of pictorial illustration.


Step1: Prepare a white flour dough with little oil and water. In case if you are not using self raising flour, please use baking soda and baking powder in the dough. Peel the skin of apples and marinate with freshly squeezed lemon juice, sugar (you may even use honey 4-5 teaspoons) and cardamom powder. Keep this marinate for about 20 minutes.


Step 2: Roll rounded dough and place it in the pie tray. Apply unsalted butter on the sides of the rim with the help of a brush. The size of the rolled dough should be such that it should hang over minimum 1 inch on the sides of the tray.


Step 3: Blend the already marinated apple slices. It should be roughly blend and then carefully put over the pie.


Step 4: Place another rolled dough over the apple mixture in such a way that it covers the same. This layer also should be minimum ½ inch spread over the pie tray. Then close the two ends in the way shown in the figure. The ends should be folded outside so that they take the shape of a half crown.


Step 5: Preheat the oven at 150 degree Celsius. Bake it inside the oven at 120 degree for 75 minutes. Meanwhile you should check the color of the pie cover. You may apply extra butter over it from time to time. This may be repeated up to four times. You may check with the help of a fork.


Step 6: Make sure that whenever you remove the pie from the oven it should be crunchy and turn to a golden brownish color. Place it on a plate. If you cut from the middle it will be crunchy from outside.


It will be a lovely Easter this time. Enjoy apple pie with your family and friends. Discover the never before taste this festive season.


Sunday, 1 April 2012

Oyster mushroom peas curry- Wow! Can simply knock off any non vegetarian item


Taste uncomparable- Oyster mushroom peas curry
Oyster mushroom is growingly popular food stuff available in departmental store. It has got very high nutritional value can be prepared easily and is quite tasty. Well, the western countries are acquainted with the use of oyster mushroom and it marks a different degree in taste while used in sandwiches, soups, stuffed or baked items. I thought in my mind; why not give it a try with the regular Indian spices? I prepared an item which can very well be relished with rice, chapatti and of course can give a blow to mutton, chicken or any non- vegetarian items. Believe it or not, Oyster mushroom peas curry it was simply unparallel in taste. Let me share the recipe with all my readers.


Ingredients: (for preparation of 4-6 people)

Oyster mushroom [1 packet, consists of 350 gms.],

Onions (2 medium sized chopped into smaller pieces),

Tomato (1 big sized chopped into smaller pieces),

Yoghurt/curd (2 teaspoons),

Ginger- garlic paste (1 teaspoon),

Coriander powder (1 teaspoon),

Cumin powder (1 teaspoon),

Potato (1 medium sized chopped into medium pieces),

Green peas (about 20 gms.)

Turmeric powder (½ teaspoon),

Red chili powder (1 teaspoon),

Salt as per taste.


Procedure: Boil water in a container and dip the oyster mushrooms into it. Keep for about 4 minutes and drain the water. This will help to make the mushrooms soft and remove any dirt/germs retained inside. Drain the rice and allow it to dry in open air. Marinate it with ginger-garlic paste, salt, turmeric powder for about 10 minutes. Heat oil in a container and dash the vegetables (onions, tomatoes, potatoes) into it. Stir till the vegetables become soft. Add coriander powder, cumin powder, red chili powder, and curd into it. Add the already marinated oyster mushroom into it. Mix well with the help of a spatula till the mixture gets an even texture. You may add ½ cup water to it so that the mixture gets a thick gravy appearance. Cook for 5 minutes till the mixture gets a very nice reddish brown color, and then switch off the gas. You may garnish it with slit green chilies and fresh coriander leaves.

You may serve it with chapattis, rice, fried rice or naan. This is a quick item, very nutritious and I guarantee your guests will finish it off to the last stain. Explore the easy culinary skills with easily available food items and get unbelievable results.


Wednesday, 28 March 2012

Rohu fish with Veggies[ Rui Maach er patla jhol]- the tasty way to beat the heat!


Rohu fish- identity of a typical Bengali cuisine


Rohu is a favorite fish and quite popular amongst the Kolkattans. No Kolkattan ever leaves his house without relishing Rohu fish n rice. The summer season is quite scorching and I thought of preparing something that suits the taste buds as well as soothes the tummy. Veggies like beans, bottle guard, parwal (pointed gourd) are always a good match to beat the heat. This episode is dedicated to all my Bengali friends and their mommies as a tribute. Hope fully all my NRI Bengali friends will truly feel nostalgic after observing this article and the photographs.’ Rui maach er patla jhol’ [Rohu in veggies] is what the Bengalis call this dish popularly. Let’s share the recipe with my global readers, eager to experience varieties of culinary updates.


Ingredients: (for 4-6 people)

Rohu fish (a medium sized sweet water carp fish cut into equal pieces after being scaled and cleaned),

Mustard oil for frying,

Turmeric powder (1 teaspoon),

Kalo jeera [black cumin, Nigella Sativa sp.] (a pinch),

Coriander powder (½ teaspoon),

Tomatoes (1 medium sized chopped into smaller pieces),

Green chilies (slit from between)

Parwal [Tricosanthes dioica sp., or green potato/pointed gourd called popularly] (deseeded and cut into quarter pieces),

Onion (1 medium sized, chopped into smaller pieces),

Salt according to taste.


Procedure: Take a little mustard oil in a container and heat it. Marinate the pieces of Rohu fish with turmeric powder and salt. When the mustard oil starts boiling, release the fish into the hot mustard oil with extreme caution. Fry one side of the fish for about 3-4 minutes and then turn the pieces. Fry the other side also for the same time till the fish becomes golden brownish in color. When the pieces of fish attain a firm contour you may remove from the frying pan and keep them aside. Dash some kalojeera in the container and vegetables (tomatoes, onions, parwal) to it. Cook till the vegetables become soft. Add spices (turmeric powder and coriander powder) to it. You will get a typical essence (mustard oil n vegetables) which will make you spellbound. You will feel the ambience of a typical Bengali cuisine. Add the pieces of fish into the vegetables and cook well till the fish mixes with the vegetables. Add about 1 cup of water so that the fish boils well along with the vegetables and get the perfect contour of a typical Bengali fish soup. You may add slit green chilies to it.

Enjoy the Rohu fish soup along with steaming rice. I bet vegetables like parwal, tomatoes, onions will help to beat the heat and fresh Rohu will be an unforgettable experience. Enjoy sweet water fishes and discover the typical taste from the land of Bengal.


Monday, 26 March 2012

Cauliflower stuffed Indian bread[ Gobi ka parantha]- simply can't resist!


The Northern side of India is especially famous for all sorts of mouth watering parantha (stuffed Indian bread) recipes. Indian bread has a unique recipe and taste that is quite easy to prepare and nutritious as well. I remember the famous ‘Paranatha wali gali’ in Delhi where you can have tongue licking exceptional recipes and a range of mind blowing paranthas. Combining vegetarian as well as non vegetarian delicacies as stuffing, Indian breads are simply awesome. Indian recipes are truly mind-blowing. Let’s see the recipe of cauliflower stuffed parantha popularly called ‘Gobi ka parantha’ in the entire Northern region of India.

Ingredients: (for preparation of 10-12 paranthas)

White flour (250 gms.),

Cauliflower (1 medium sized chopped and boiled),

Turmeric powder (1 teaspoon),

Coriander powder (1 teaspoon),

Cumin powder (1 teaspoon),

Ginger paste (1 teaspoon),

Red chili powder (1 teaspoon),

Tomatoes (2 medium sized).

Procedure: The process is demonstrated in a step wide manner schematically with the help of pictures.


Step1: Mash the already boiled cauliflower. Heat oil in a container. Dash tomatoes, cumin powder, coriander powder, ginger paste, red chili powder, turmeric powder into it. Stir well with the help of a spatula till it takes an even contour. This will be used as a stuffing inside parantha. Allow the mixture to be cool.


Step 2: Prepare dough out of the white flour adding little salt, oil and water. Press the dough evenly with the help of your hands and make equally shaped rounded balls.


Step 3: Scoop a little of the cauliflower stuffing with the help of a spoon and put it inside the dough, then close the two extreme sides.


Step 4: Roll the dough with the help of a rolling pin till it becomes a flat rounded structure.


Step 5: Put the rounded structure in a tawa (flat container) and heat evenly from all sides. Apply oil till it becomes golden- brownish in color. The parantha takes a crispy appearance.


Remove to a plate. Serve it to your guests with chutney, pickles or curry of your choice. Simply love the delicious, crispy delight with cauliflower stuffing inside. Wow, its taste and nutrition at the same time.


Sunday, 18 March 2012

Grilled Salmon in unauthentic sauce- tangy, tasty n exciting


Salmon in a sauce; never before experience

Salmon as a fish is truly exciting in terms of taste and food value. This fish with pink flesh, found abundantly in the Atlantic Ocean is a rich source of phosphorus. Salmon is quite popular in the Western countries. Influenced by one of my friend staying in the US who is a culinary expert, I dared to experiment with salmon and a quite ’out of the box’ sort of sauce which came out amazing and I was truly extraordinary. Let me share my recipe with all my fish lover friends.

Ingredients: (for preparation of 4 persons)

Salmon fillets (350 gms.),

Coconut milk (1 can),

Peanut sauce (3 tablespoons),

Tamarind paste (2 ½ teaspoons),

Onions (2 medium sized crushed in the form of a paste),

Garlic paste (1 teaspoon),

Ginger paste (1 teaspoon),

Galangal (1 tablespoon),

Tamarind paste (1 ½ teaspoon)

Salt as per taste,

Olive oil (1 tablespoon),

Peanuts roasted to enhance the taste.


Procedure:

Preparing the salmon fillets:

Brush the salmon fillets with olive oil and salt and roast in oven for 5-7 minutes till it get completely soft. Remove from the oven and keep aside.

Preparing the sauce:

Take 1 ½ tablespoon of olive oil in a frying pan and heat it. Add the ginger paste, garlic paste, peanut sauce, onion paste, tamarind paste, galangal in it. Simmer one can of coconut milk into it. Use a spatula to mix all the ingredients till it forms an even blend. Roast a small amount of peanuts (25 gms. ,de -skinned) and keep aside. Toss the grilled salmon fillets with the sauce prepared and garnish with chopped parsley, coriander leaves and roasted peanuts.

You will really enjoy this unauthentic taste of the sauce which is a blend of sweet, sour and salty flavors. Discover a new way of enjoying fish.


Wednesday, 14 March 2012

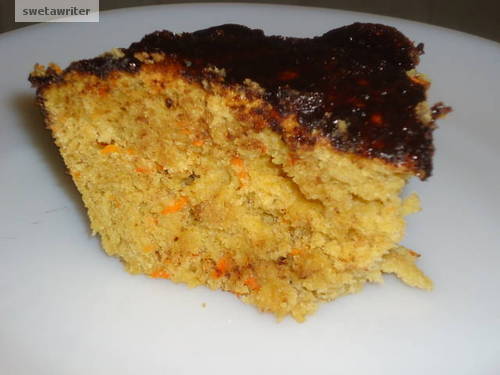
Carrot cake wid chocolate icing- the melt in mouth treat


When you are a human being, you can’t forego the goodness of carrot. It occurs often that children are fussy about eating vegetables. Combining the goodness of vegetables with baking? How does it sound? Yes, I was following a very popular TV channel when I had this thought in mind, how to make baking a little different and induce the goodness of vegetables in it. What I discovered was the exceptionally good Carrot cake – a yummy deal. Not only the taste and the flavor, but the color and the texture just made me spellbound and a feeling of ‘innovative achievement’ and satisfaction ruled in my mind. Let me share the recipe with all my friends.


Ingredients: (for a cake of 1.5 kg. weight)

White flour (2 cups),
Sugar (1 cup) ,
Egg beaten (1 pc.)[The white part and the yellow part beaten separately] ,
Unsalted butter/Margarine (200gms/approx 1 cup, measured by putting it in a cup),
1 teaspoon baking soda,
1 teaspoon baking powder,
Cardamom powder (½ teaspoon),
Cinnamon powder (½ teaspoon),
1 medium sized carrot (de skinned and then grated properly),
Unsalted butter (50grams for preparing the icing layer),
Icing sugar (100gms.),
Drinking chocolate powder (5 tablespoons) ,

Equipments used:
Baking tray,
Brush for putting oil,
Butter-paper to avoid sticking of the cake to the walls of the tray.


Procedure:

For the cake:

Measure the sugar and the unsalted butter in a container. Beat it well with the help of a spatula/electric mixer till the sugar melts well and forms an even mixture. After breaking an egg separate the white part from the yellow one. Beat the white part separately and then mix with the mixture. Add the cinnamon and cardamom powder. Mix it well and then add the yellow part of the egg. Add the white flour and mix the entire mixture again till it becomes smooth in texture. Add the grated carrot to the mixture. Beat it properly. Pre-heat the oven at 220 degree Celsius. Cut butter paper according to the size of the baking tray and place it with the help of a brush and oil so that it fits properly. Now you may pour the entire batter slowly. See that it is leveled properly. Bake it for 30 minutes at 200 degree Celsius. Remove the cake after the baking is complete. Allow it to cool down.

For the chocolate icing:

Take the butter, icing sugar, drinking chocolate in a container. Beat well with the help of a spatula/electric mixer till it takes an even texture. With the help of a spatula/ knife spread the chocolate icing evenly over the surface of the cake. Allow it to stand for 20 minutes till the icing layer solidifies.

You may surprise your children , your guest or give a surprise to your friends on special occassion. It's fun to be a magic baker.


Wednesday, 7 March 2012

Paneer Samosa? It's different yaar!


When festival is knocking at the doorsteps, you feel like trying something different. Indian festivals have always been the icon of happiness, brotherhood and unity in diversity. This Holi (a festival of colors), I felt of trying something different with a very popular snack item ‘samosa’. Paneer is a very favorite magic item and healthy too. So, I thought to my mind ‘why not combine these two ingredients and make something truly memorable in terms of taste and innovation?’ The answer to my question was the very tasty, ‘out of the box’ concept called ‘Paneer samosa’. Let’s see the procedure of preparing this recipe.


Ingredient: (For preparation of 30 samosas)

White flour (350 gms.),
Mashed cottage cheese /paneer chunks mashed (with the help of spatula under slight hot water) [200 gms.],
Ginger paste (1/2 teaspoon),
Cumin powder (¾ th teaspoons), 
Coriander powder (½ teaspoon),
Turmeric powder (½ teaspoon),
Tomatoes chopped into smaller pieces (1 medium sized),
Onions chopped into smaller pieces (1 medium sized),
Green peas (100 gms, parboiled condition),
Red chili powder /grated green chilies,
Salt according to taste, 
Oil for frying.

Procedure: The procedure is represented in a step wise manner.

Preparing the paneer filling:

Take Paneer chunks into a bowl with hot water. Mash it with the help of a spatula. When it becomes an even mixture keep it separate. Heat about 4 teaspoon of oil in a container. Dash the chopped vegetables (onions, tomatoes, green peas) into the container and fry well. Add the ginger paste to it. Shift the mashed Paneer chunks into it. Add the spices (cumin, coriander, turmeric and salt) to it. You may add chili powder /grated green chilies which is optional and depends on how hot you would like to enjoy your food. Keep the mixture separate. This is to be used as the stuffing.

Preparing the cover:


Step 1: Make dough with white flour, salt, oil and little water. Make very smooth dough. Prepare rounded structures with it and roll with the help of a rolling pin.


Step 2: Put the stuffing with the help of a spoon at the centre.


Step3: Fold the rolled dough half way; again fold it half as shown in the figure. It will appear like the shape of a pyramid. Press the sides evenly so that the stuffing should not come out. You may leave this structure for some time in the open air to be hardened and firm.


Frying the samosa dough:

Pour good volume of oil in a container .Deep fry the folded samosa dough in oil for about 2 minutes till they change the color to a golden- brownish one. Remove it from oil and put it in a platter to serve.your

I am sure that whenever you will serve it to your guests they will be spellbound. Make this festive season more colorful with your excellent cooking techniques.


Day trips you can plan starting from Madrid

Spain, a country situated along the Iberian peninsula, South Western Europe shelters 48 UNESCO world heritage sites, beaches, vibrant cit...